Network computers not showing up in Windows 11 File Explorer? This frustrating issue is surprisingly common and can disrupt your ability to share files and access devices across your network. Don’t worry – solutions exist! In this comprehensive guide, I’ll walk you through proven troubleshooting steps, restoring visibility and streamlining your workflow.
Understanding Network Discovery
Before diving into fixes, let’s understand network discovery. This Windows feature allows your computer to detect other devices on the network and vice-versa. Network discovery issues often prevent your PC from being visible in File Explorer.
Solution 1: Restart Windows
Sometimes, the most straightforward solution is the most effective. Before diving deeper into settings, try restarting your Windows computer. A fresh reboot can often resolve temporary glitches that might be causing network visibility issues.
To restart Windows 11 or 10, right-click on the Start button ![]() , go to Shut down or sign out, and choose Restart.
, go to Shut down or sign out, and choose Restart.

If network computers aren’t visible yet, let’s try Solution 2 for more options.
Solution 2: Network Discovery Settings
On Windows 11:
- Open your Windows Settings
 by pressing Windows key + I or right-click on the Start button
 and choose Settings.
- Navigate to Network & Internet and click on Advanced network settings.
- Under Network adapters, select Ethernet or Wi-Fi based on your network connection.
- Click Advanced sharing settings under More settings.
- Expand the section for your current network profile (usually Private network), and ensure these options are enabled:
- Network discovery
- Setup of network-connected devices automatically
- File and printer sharing
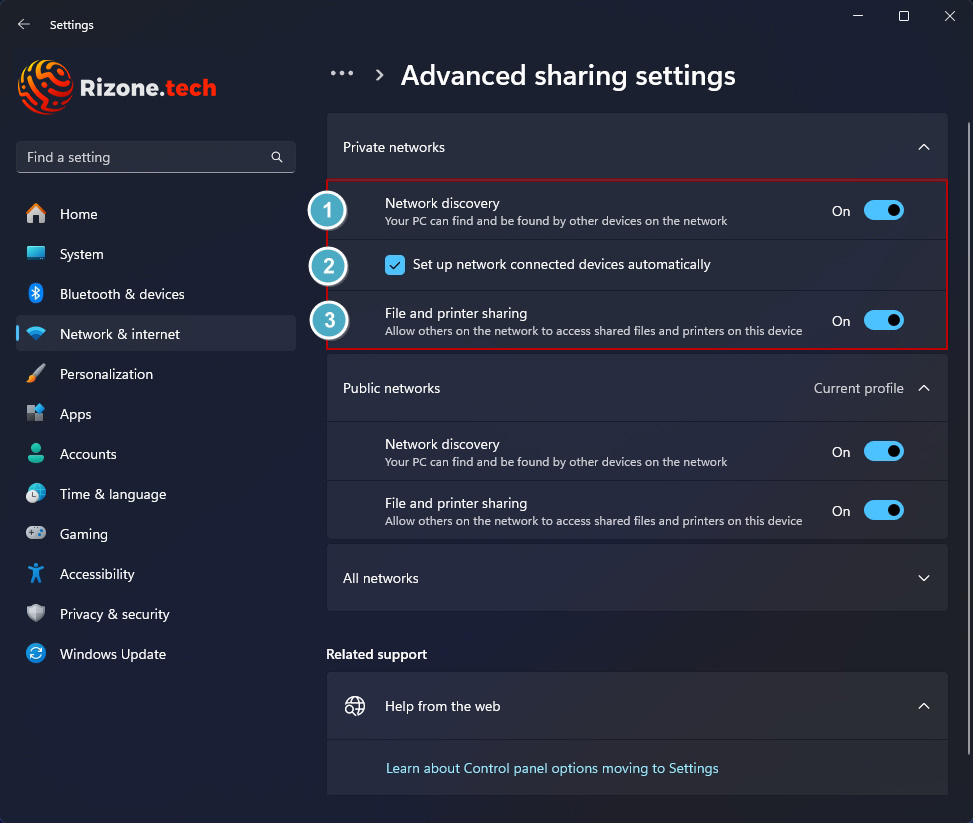
If you don’t see the Advanced sharing settings option follow the steps below:
- Press Windows + R or right-click to open the Run dialog.
- Type
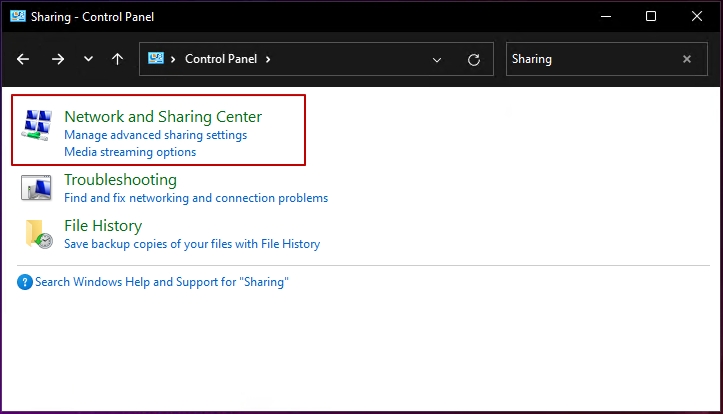
Controlin the Run box and press Enter to open the Control Panel. - Search for
Sharingand click Manage advanced sharing settings. - Now carry on with Step 4 under the On Windows 10 section.
On Windows 10:
- Open Windows Settings
 by pressing the Windows key + I or right-click on the Start button
  and choose Settings.
 - Navigate to Network & Internet > Ethernet (or Wi-Fi if you’re on a wireless network).
- Click Change advanced sharing options.
- Expand the section for your current network profile (usually Private), and ensure these options are selected:
- Turn on network discovery
- Turn on automatic setup of network connected devices.
- Turn on file and printer sharing
- Turn on network discovery

If the issue persists, move on to Solution 3.
Solution 3: Enable the Function Discovery Resource Publication Service
Enable the Function Discovery Resource Publication Service in Windows 10 or 11 using these steps:
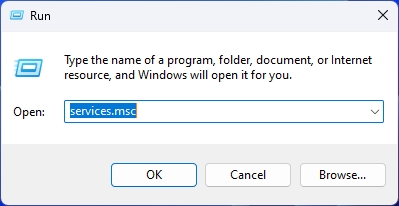
- Press Windows + R or right-click on the Start button
 and choose Run to open the Run dialog.
 - Type
services.mscin the Run box and press Enter. - In the Services window, scroll down to the Function Discovery Resource Publication service.
- Double-click it to open its properties and set its startup type to Automatic.
- Finally, start the service and press OK.
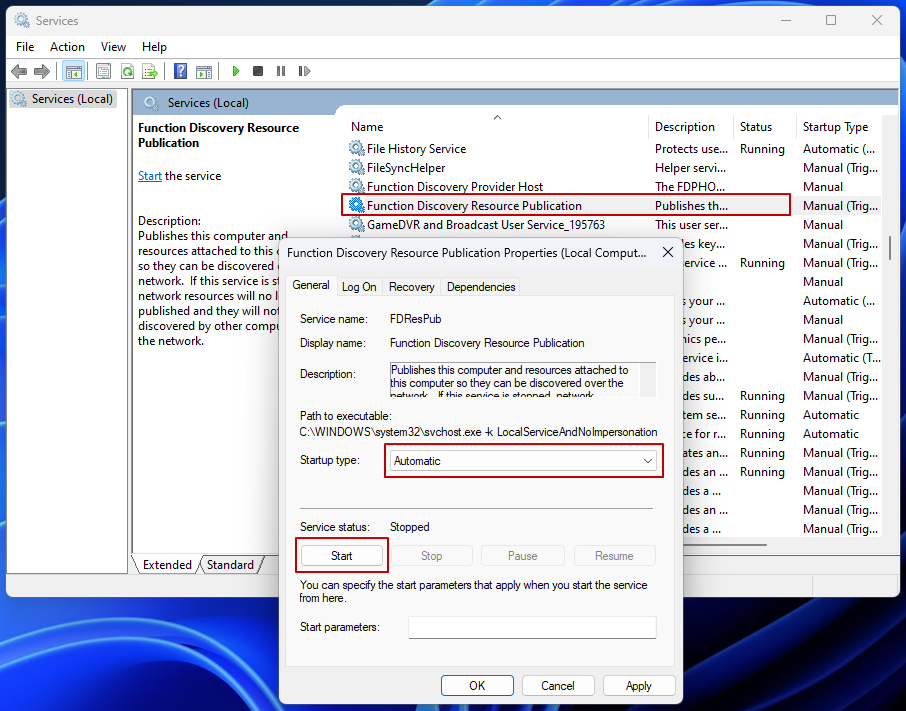
If network computers remain hidden, continue to Solution 4 for further troubleshooting.
Solution 4: Workgroup Consistency
To ensure workgroup consistency, follow the same steps for both Windows 11 and Windows 10.
- Right-click on the Start button
 and choose Run to open the Run dialog.
 - Type
SystemPropertiesComputerNamein the Run box and press Enter. - Verify that all computers on your network belong to the same workgroup. To adjust this, click the Change… button next to To rename this computer… and edit the Workgroup: field.
- Restart your computer for the setting to take effect.

Conclusion
If these solutions worked for you, let me know in the comments below! Did you find a different fix for the network visibility problem? Share it to help others in the Windows community. Thanks for reading!
